How To Group Debtors
This document discusses manually grouping debtors that
you would like to keep together.
There are several reasons for grouping debtors:
* You may realize that several of your accounts are related and
you may wish to view them together.
* You might have one outstanding debt, such as a funeral home
bill, with several debtors who could be responsible to settle the
account.
* You may have several debtors who belong to the same
Client, or share some other type of information that you want
to keep together.
* You may have a group of debtors setup already and you may
get a new debtor that you want to add to the group.
In any of these cases, and others, Collect! allows you to
link these accounts together.
Getting Started
First, let's find the first Debtor that you would like to put
in your group.
1. Pull down the Browse menu and choose Find By Name.
You will be presented with a form where you can type in
a name for Collect! to find in your list of Debtors.
 Type in a name just as it appears in the Debtor
form, that is, Last Name, comma, First Name. It is not
necessary to capitalize the letters. You can also look
for near matches. Please read the instructions in the
Find By box or look up Find By in the Help index.
Type in a name just as it appears in the Debtor
form, that is, Last Name, comma, First Name. It is not
necessary to capitalize the letters. You can also look
for near matches. Please read the instructions in the
Find By box or look up Find By in the Help index.
2. When you have entered a name for Collect! to find,
select OK. The Debtor form for that name will open on
your screen, if Collect! finds it.
3. Let's assume the system has found the name and proceed.
Now that you are looking at the Debtor form, notice the 'GROUP
button near the top of the form, in the center. It has an arrow
on either side of it.
 If the Debtor you chose is already in a group, this
button will be yellow and the arrows will be yellow.
You can press the Group button to see all members
in the group or press the arrows to see the Debtor
form for each member at a time.
If the Debtor you chose is already in a group, this
button will be yellow and the arrows will be yellow.
You can press the Group button to see all members
in the group or press the arrows to see the Debtor
form for each member at a time.
4. Press the Group button. If the Debtor is not already
in a group, you will be prompted to form a new group.
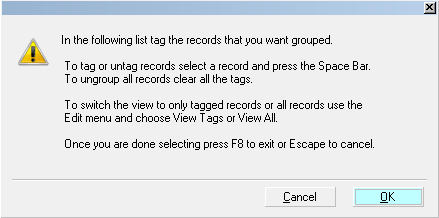
Prompt To Select Debtors To Group
5. Read the instructions carefully and select OK. The list of
all debtors will open and your first choice is already highlighted
in yellow. This means it is selected.
6. Now use the arrow keys to find other records you want to group.
When you find one and it is highlighted, (it is black) press the
spacebar and it turns yellow. Now it is selected too.
7. Carry on until you have selected all your debtors for the group
this way. After they are selected, they show blue when you move
off that line in the list.
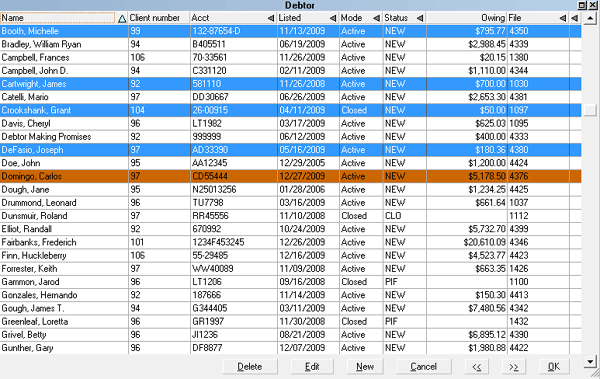
Selected Debtors for New Group
Look in the last column of the list of debtors. Notice
that this particular list has a number 5 there for some records.
This means they are in a group. This column shows a number
when a debtor is in a group. Collect! gives each new group a
a different number. When you are finished with this exercise,
your group will have a number too.
8. Now that all of your debtors are selected, Press F8.
If none of the debtors that you selected are currently in a group,
Collect! prompts you to create a new group.

Prompt to Form a New Group
If you have Account Matching enabled, Collect! may ask
you if you want to copy information, depending on your
Account Matching Setup.

Prompt to Copy Information in New Members
If some of the debtors that you selected are currently in a group,
Collect! prompts you to join them to an existing group.
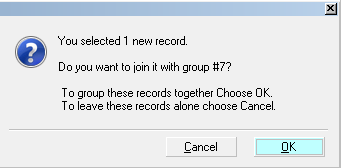
Prompt to Join To an Existing Group
9. Select OK to proceed with grouping the accounts.
10. You are returned to the Debtor form and now the Group
button is highlighted and the arrows on either side of it are too.

Debtor with Group Information
Also, there is a Group Number in the Group box (in the case
above, it is ' 7') and the current Debtor has a Group Member Number
(in the case above, it is '1'). You can select the arrows to see
the other accounts in this group. Notice that each of them has the
same Group Number but a different Group Member Number.
11. Click on the Group tab. This shows all of the members
in the group in the Matching Accounts list. Group financial
totals are also displayed. Press F1 to see help on this form.
From the Matching Accounts form you can edit the group or
its individual members, or run a contact plan across the group.

Adding Members To A Group
If you choose to group a Debtor who already belongs to a
group, the Group button will be highlighted in yellow when
you first view the Debtor's record. If you press the Group button,
as you have just done, you will see the Matching Accounts form.
Press Edit Group and follow the instructions displayed on
the screen. The steps outlined above should be followed
for selecting additional debtors for your group.
Account Matching
When you enter a new Debtor, Collect! can automatically
find matching accounts based on criteria you choose. The
Group Member Setup button that you see in the Matching
Accounts form is a way of fine tuning your Account Matching
routines.
However, Account Matching MUST be set up by
administrative staff prior to grouping debtors or
editing matching criteria in the Matching Accounts
form. Setup is performed through the Account Matching
Setup accessed from the Options pull down menu,
Preferences. Choose Plans and Reference Tables.
See Also
- Introduction To Grouping Accounts
- How To Ungroup Debtors
|
Was this page helpful? Do you have any comments on this document? Can we make it better? If so how may we improve this page.
Please click this link to send us your comments: helpinfo@collect.org